
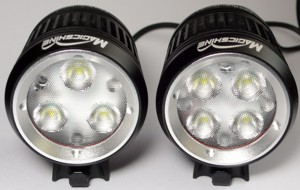
 Como era de esperar, nuestros amigos los chinos, especialistas en fabricar iluminación de alto rendimiento para mountain bike, han sacado un nuevo modelo, a parte de los chorrecientos que ya tenían...pero lo especial en este caso es que este tiene alguna característica que le hace más interesante para la espeleología que el resto. La primera de las razones es posibilidad de regular el flujo lumínico con cuatro modos, especificadoes a continuación. Y el segundo motivo es que según lo venden es resistente al agua. También y muy importante para montarlo en un casco es que respeta unas dimensiones aceptables, diámetro 42 mm y longitud 48 mm. He extraído de la siguiente web (ligth test) un análisis del frontal comparándola con otros frontales fabricados en China. Está en ingles y no tengo muchas ganas de traducirlo todo, así que para los que anden un poco peces lo más rápido google traslator.
| Fabricante | Magicshine | Magicshine |
| Modelo | MJ-870 | MJ-872 |
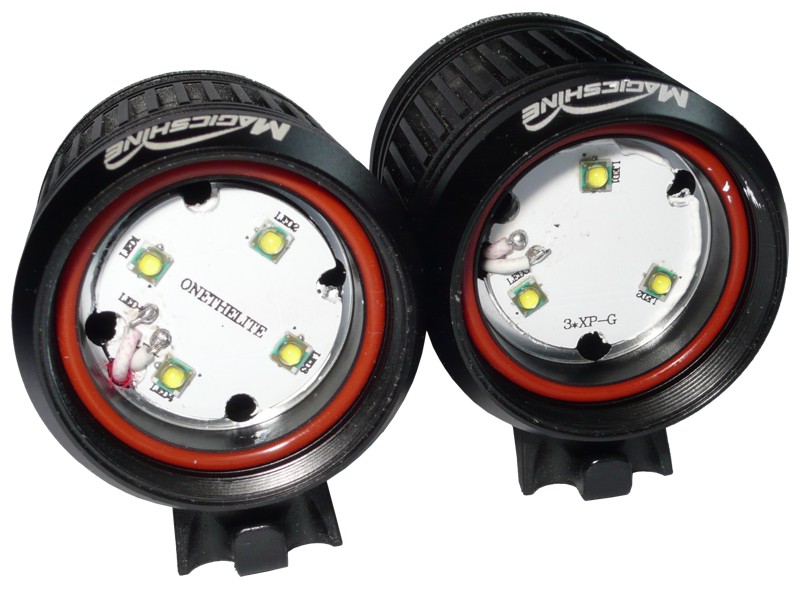
| Tipo de led | 3xCREE XP-G | 4xCREE XP-G |
| Flujo lumínico | 1200 lumens | 1600 lumens |
| Potencia | 15W | 20W |
| Material | 6061-T6 Aluminum alloy | |
| Resistencia al agua | IP64 | |
| Interruptores | Dos | |
| Modos de trabajo | 100% / 70% / 50% / 30% | |
| Baterías | Li-Ion 4,4Ah - 4x18650 | |
| Duración baterías | 2,2 to 9,5 horas | 2,5 to 11 horas |
| Tiempo de carga | 3-3,5 horas | |
| Precio | 126$ | 146$ |
| lightandgo.com | Fireball 129.90$ |
Foride
149,90$ (Magicshine MJ-856) |
| one-eye-vision.de | Ray-1280 189,0 Euro | Aton 239,00 Euro (Magicshine MJ-856) |
Impressions
The first impression, even before the lamp is delivered, is: Why is the lamp so expensive??. We have used to a lamp for 70 dollars and now the Chinese serve the version at 140!! But, the demand and supply law; however, despite of the higher price, I do not expect that there will be any problems with the demand ;). The operating instructions and the complete set of information about the lamp, the information about the guarantee: it’s simply a shock; usually, none instructions have been available or the kit has included a poor copy; and, here, we have several-page-long color instructions. The completely new shape of the head, good workmanship, two control pushbuttons enabling switching the light on in the Low or High mode and switching between the modes.

While the hitherto existing lights have been made after the torch fashion and everything has been inserted from the front, now the component on which mcpcb is located is not an insert but a part of the body what insures good transportation of heat into the casing. The contact surface has been equalized nicely; this is not a mirror but it is very well as for Chinese standards.How does it work in practice ? On the maximum mode for MJ-872, after stabilization of temperature (the light has stood on my desk and the measurement has been taken with a pyrometer), on the mcpcb, I’ve measured 65,9*C while 56,7*C on the casing. Now the leds have a chance for a longer life than in the earlier structures wherein, sometimes, the led was boiling in its own sauce and the housing was scarcely warm. The casing itself looks as a complicated one in make only to the instant that it is disassembled into prime factors.
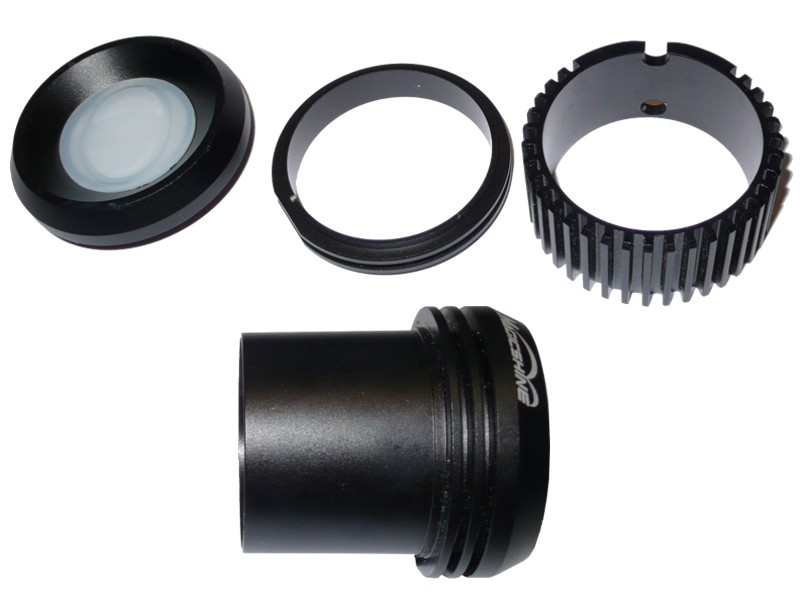
After ramping up the switch cover can be push out easily - this is not too tight - some silicon grease doesn't hurt . Optics has a 33mm diameter and 11.8 mm in height - finding a replacement may be troublesome, because the most common dimension is 35mm.Power supply. In the standard version, you receive a package well known already, packed into a rubber jacket with a protective cover provided with 2 burrs serving for fixing the same to the bike frame; it woks: nothing got loose nor rattled during several hours of my travel. A novelty may be the manufacturer’s promise concerning “more company-specific” cells applied in the package now (the information given both in the advertising folder and in the instructions).

At an occasion, the package contents shall be checked though, but at present days, 4,4Ah does not induce any rage and the guaranty for the package and the charger is still 1/2 year only :p.
Fortunately, the Chinese, as usual, over-colored the declarations of the light power values since, even with a bigger battery packs, the lights would not feature with the operating time values declared;). On the maximum modes, the lights draw respectively: MJ-872 - 16W, MJ-870 - 13W; for the purpose of a comparison: MJ-808E on Cree XM-L draws 10,5-11W only.
Magicshine MJ-870 8,26V without load
I-In V-in P-In I-led V-led P-led Eff.
High 1,66A 7,88V 13,08W 3353mA 3,31V 11,10W 84,9%
Mid2 1,18A 8,00V 9,44W 2348mA 3,19V 7,49W 79,3%
Mid1 0,86A 8,08V 6,95W 1683mA 3,10V 5,22W 75,1%
Low 0,33A 8,19V 2,70W 671mA 2,93V 1,97W 72,8%
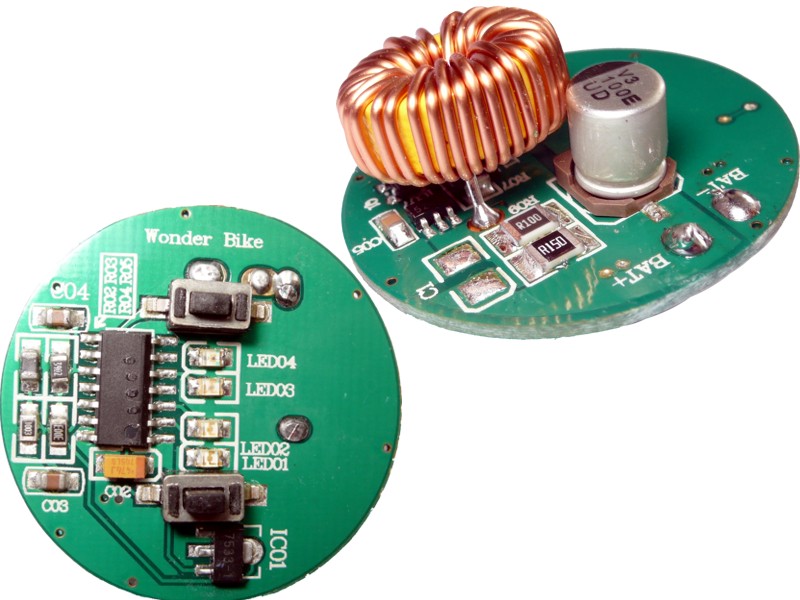
This is a plain BUCK driver only (it decreases the voltage value and increases the current intensity), curious thing is the maximum current value amounting to 3,3A what means that, if a bigger distributor orders MJ-808E units supplied with such current, then Magicshine have no problem to manufacture such light since they have the ready controller. At the very beginning, I replaced the led power-supply cables since, at my guess, they did not look appropriate for led power supply with 3A current (after checking: 26AWG -> 0,13mm2)
Magicshine MJ-872 8,22V without load
I-In V-in P-In I-led V-led P-led Eff.
High 2,06A 7,79V 16,05W 1093mA 13,16V 14,39W 89,6%
Mid2 1,45A 7,93V 11,50W 768mA 12,72V 9,76W 84,9%
Mid1 1,04A 8,03V 8,35W 551mA 12,33V 6,80W 81,4%
Low 0,40A 8,16V 3,26W 220mA 11,58V 2,55W 78,1%
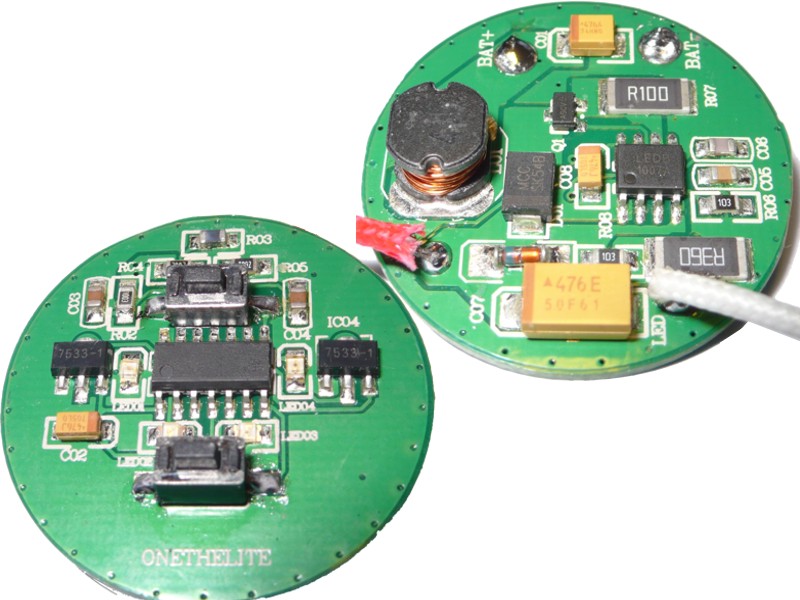
A nice surprise here: a completely new BOOST type driver (increasing voltage), very nicely manufactured and efficient, in addition. By the way, upon the denotations on the controllers and the mcbpcb board, you can easily find what has been manufactured for whom and who sells the Magicshine lights under its own brand (in somewhat different casings, with another optics and, sometimes, with another holder, but with the same inside).How does it light ? As mentioned at the very beginning, there are the two versions: the 3-led and the 4-led ones.
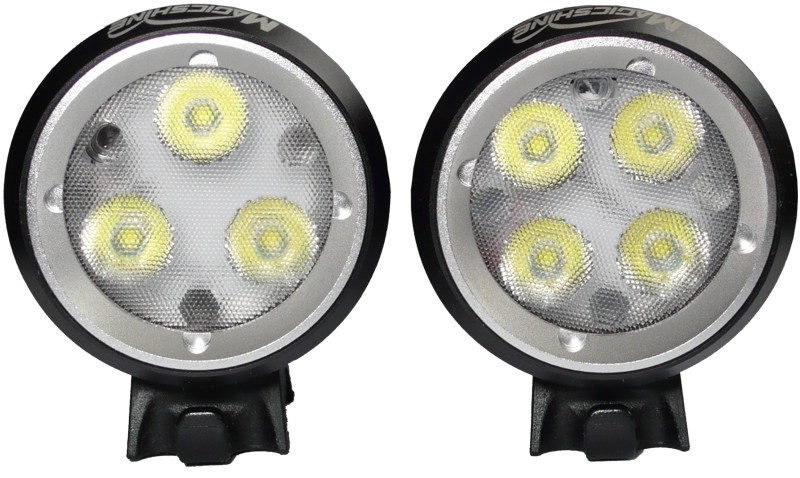
Assuming that I did not get jumbled up during the measurements and that the Chinese did not insert there the possible worst Cree XP-G leds, but only the most popular R4, in theory, on the leds, you should get 1400 and 1050 lumens so that, in both cases, the lights exceed the magic limit of 1000 lumens. However, frankly, if you add circa 10% loss across the optics, you will have 1250 and 950 only but this is still a lot of light :). Well, of course, the weakest mode has 20% instead of 30, but the Chinese light users have got used to such trifles already :).
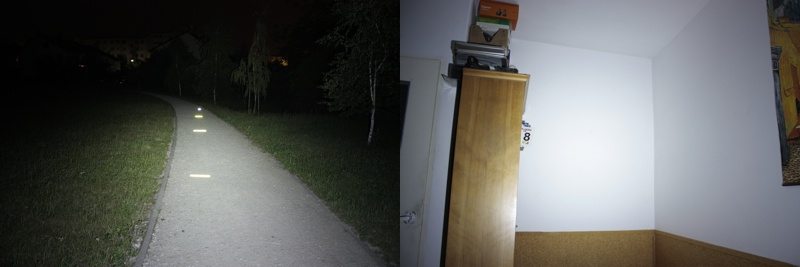
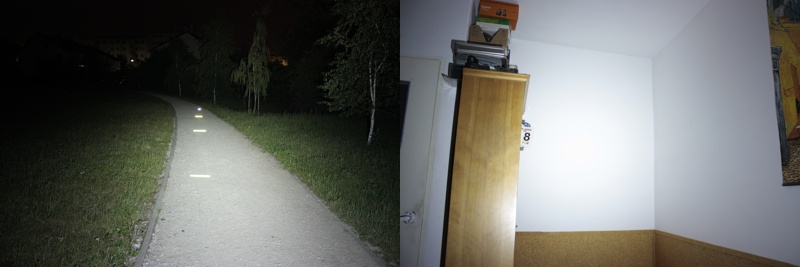
Magicshine MJ-870 - high (100%, ca. 950 lumens)
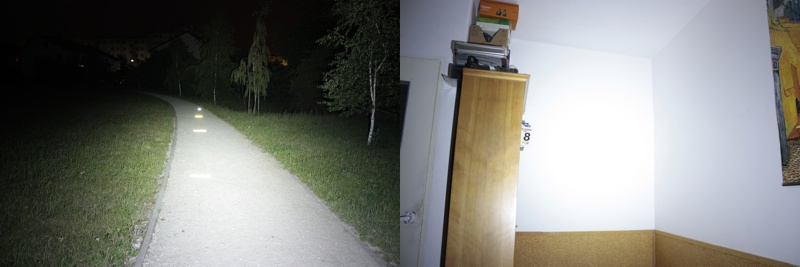
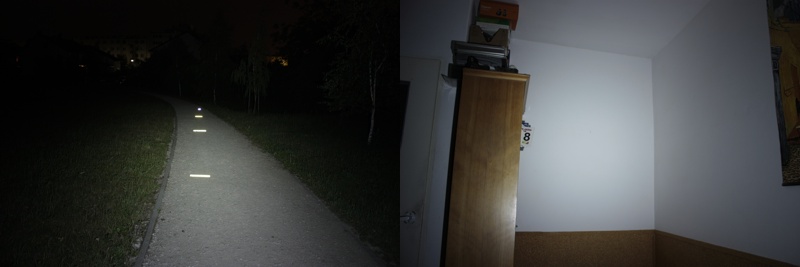
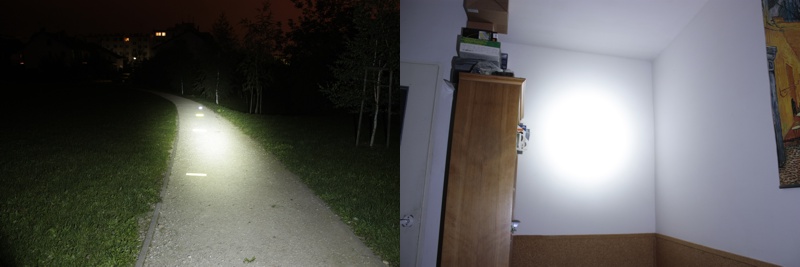
Magicshine MJ-870 - mid 2 (70%, ca. 700 lumens)
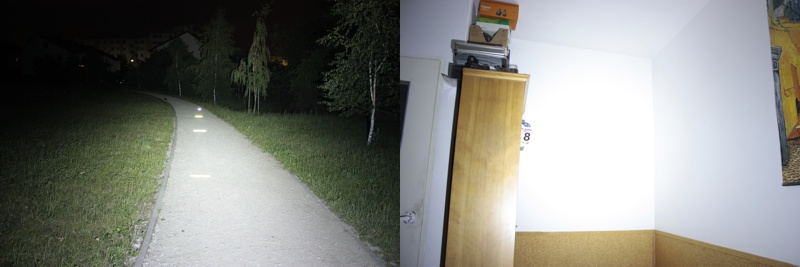
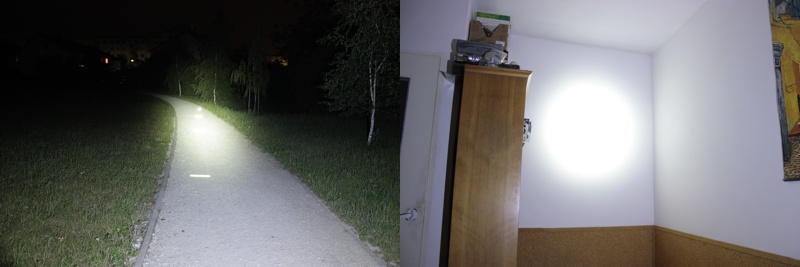
Magicshine MJ-870 - mid 1 (50%, ca. 500 lumens)
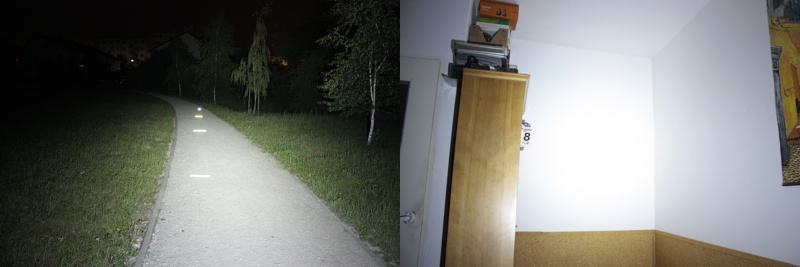
Magicshine MJ-870 - low (20%, ca. 220 lumens)
The most of all expected little monster of the year 
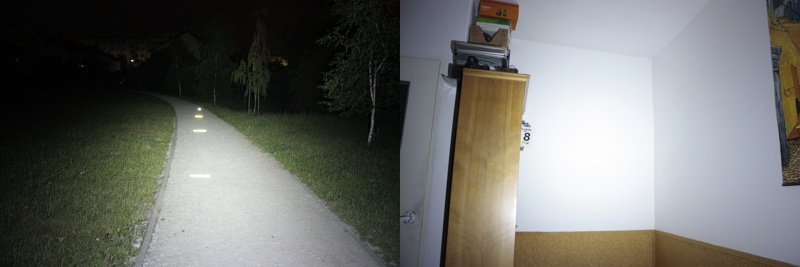
Magicshine MJ-872 - high (100%, ca. 1250 lumens)
Magicshine MJ-872 - mid 2 (70%, ca. 900 lumens)
Magicshine MJ-872 - mid 1 (50%, ca. 650 lumens)
Magicshine MJ-872 - low (20%, ca. 320 lumens)
By the way of reference: :
Magicshine MJ-808 - SSC P7 (high ca. 600 lumens)
Magicshine MJ-808E Cree XM-L (high, ca. 750 lumens)
Resume.
The new lights, the new quality, a lot of light. I tested MJ-872 in a fight, arranging and winding up the route of the night competition for orientation; the 300+ lumens on the low mode were completely enough for me to move on broken-stone roads; I switched on the maximum mode once, perhaps most probably in order to see how it would be ;). What does it give in practice ? On the single battery pack, you may ride for 10 hours !. The optics of the distribution angle circa 20* illuminates ideally the road before the bike. To put into words simply, after the tests, the 4-unit stays with me (after replacement of the cables, thermo paste, lubricating of all gaskets and threads with silicone grease and accurate tightening; at last, its Chinese stuf.


